| The Fabric Determines the Structure |
Marcy Petrini
March, 2024
Look at this fabric:

You undoubtedly recognize it as plain weave. What would you answer if I asked you: how did I weave it?
It you learned to weave on a four-shaft loom, you probably would answer 1&3 vs. 2&4 (on a straight draw), even though 1 vs. 2 when threaded 1, 2, would have been equally possible.


When I weave on my rigid heddle loom, heddle up, heddle down produces plain weave. For finger manipulated weaving, we use the mantra: one over, one under.
Thus, looking at the plain weave fabric there is no way of knowing how it was woven. The fabric determines the structure, regardless of how we may have gotten there. And there is more.
As shown below, while plain weave can be woven across the fabric on a huck threading using 1&3 vs. 2&4, Bronson Lace must use the treadling of 1 vs. 2&3&4 on 4-shafts, or 1 vs. all other on more shafts.


The ground cloth in overshot is formed by treadling 1&3 vs. 2&4 (drawdown on the left below), but in summer & winter we must treadle 1&2 vs. 3&4 (drawdown on the right below).


If we look at these drawdowns, we see that to weave plain weave we alternate raising (or lowering) every other thread. This is also the way we can determine whether plain weave can be woven across a fabric.
Look at the drawdown of M’s & O’s below. When block A weaves weft floats, block B weaves plain weave and vice versa. We can obtain plain weave down the selvage, but we cannot treadle plain weave across the entire fabric.

If we look at the “every other one thread” rule, we have for all the blocks:
First pick: 1, 1, 3, 3, 1, 1, 2, 2
Second pick: 2, 2, 4, 4, 3, 3, 2, 4, 4
Shafts 2 and 3 appear in both picks, thus plain weave is not possible across the fabric.
The fabric determines the structure not only with plain weave, but with all fabrics. Here is another example. Below is a sample of huck.

How did I weave it? With the threading and the treadling in the drawdown below on the left or the one on the right?


I color coded the two blocks and plain weave area to show how they are equivalent in the two drawdowns. When I first leaned to weave, I was taught huck with the threading and treadling on the left. Over time, the threading was changed to allow for the structure to expand easily to more shafts; the treadling steps of course also had to change, but the plain weave treadling was maintained. The drawdown on the right is equivalent to that one above next to the Bronson Lace.
Next time you are unsure what you are weaving, note the threading and the treadling steps but don’t forget to look at the drawdown and its characteristics. The fabric determines the structure.
Happy Weaving!
Marcy
| In Defense of Weaving Classification |
Marcy Petrini
February, 2024
In the early 90’s I became aware that weaving structures could be classified to help us understand them. Donna Sullivan published her book Summer & Winter A Weave for All Seasons and came to teach the workshop to my local guild. She introduced the classification for tied unit weaves which, however, were still pretty overwhelming to me. I promised myself that I would spend some time to learn more in the future.

From then on, any time I came across a tied unit weave in a publication or sample, I would look at the block threading and treadling and make a drawdown. It was filed electronically in a subdirectory for that purpose.
Times goes fast when you are having fun, but finally I wanted to be serious about understanding tied unit weaves more fully. I submitted a proposal for Convergence® 2020 on the subject. It was accepted, but as we all remember, it wasn’t until 2022 that the conference actually occurred. Having a deadline and a purpose is a good way for me to focus.
I decided that I would use Donna’s book and systematically try to understand the blocks by changing the various parameters that she discussed.
I have talked about her classification before, but here it is again to simplify the discussion. It is based on the threading:
|
Single, |
Number of pattern shafts |
|
# Tie shafts |
Number of shafts |
|
Paired |
Whether |
|
Ratio |
# of tie-down threads |
Summer and winter is a single, two-tie, unpaired weave with a ratio of 1:1.

From the threading we see that each block has one pattern shaft, block A 3, block B 4. Hence the single designation.
There are two ties, on shafts 1 and 2.
The two ties are not next to each other, they are separated by the pattern shaft, hence unpaired.
For each block, there are two pattern threads, albeit on the same shaft, and two ties; 2: 2 or 1:1 ratio. In this case the ratio is not needed as the rest of classification makes it unique to summer and winter.
As I was studying these structures, I thought: how about a single, two-tie paired structure? I couldn’t find one, so I did a drawdown following the classification directions.
Since the single, two tie paired can be woven on four shaft, I started the paired option on four shafts. (This and following drawdowns are sinking shed).

It is feasible. It doesn’t weave plain weave across the fabric, but that happens with other tied-unit weaves as well. I decided to weave it. Since the Convergence® seminar was on eight shafts, I expanded the four shaft version above to eight shafts and wove it. Below is the drawdown and the fabric front and back.


This was the first benefit of the classification: finding other options that may not have been previously published. Someone else may have tried it and not liked it, but I rather like the fabric.
The structure does require fourteen treadles to weave, but it can collapse to 10 by using two feet. If you don’t know how to do that, you will just have to read my “Right from the Start” in the summer issue of Shuttle Spindle & Dyepot.
I woven as many samples as I could, mostly individual blocks. There are various motifs published that combine blocks, and that is a great option for weaving, but I wanted to understand the blocks first – and I wanted others to do the same. The design comes later.
Finally, it was time for Convergence®. Most but not all of samples for the monograph were woven, but I did have drawdowns for all the ones I wanted to discuss. There were a few in my “to weave” list and I am sure there are others. I will continue to search for them and weave them as the opportunity arises.
After my seminar, one of the attendees came up to me to tell me that she enjoyed my seminar, but she was surprised that I didn’t include Quigley in my collection of weaves. I told her that I ran out of time, but that Quigley was on my list to do, especially since she was one of my “neighbors.” She founded the Memphis, TN Weavers Guild, one of my weaving friends from that guild told me.
I will be teaching a seminar at the upcoming Convergence®, on blocks in general, so I have been thinking about tied unit weaves again. Time to weave Quigley, I thought.
I started planning it with the drawdown below.

I was in the middle of the second block when I said to myself: “wait a minute, that’s a single, four unpaired ties with a 1:1 ratio – I have that in my monograph, the drawdown, not the sample.”
And sure enough, the following drawdown is in my monograph. It’s fun to give credit to the weavers who came before us and designed these weaves, but unless we use the classification, we don’t really know what these structures are.

I wove the sample below, front and back, just in time for my recent zoom workshop for the Intermountain Weavers Conference.


But there is more. Recently I was looking for Quigley in my files and I know that Robin Spady has woven it with different treadlings, and Louise French had an interesting treadling for a sample in the Cross Country Weavers notebook. Now that I know what Quigley really is, I can pay full tribute to my “neighbor.”
Happy Weaving!
Marcy
| Always Mix, Never Worry |
Marcy Petrini
January, 2024
Well, almost never.
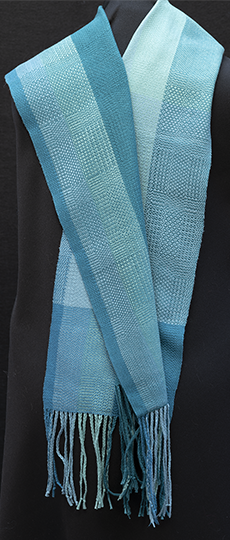
For a long time, my go-to-yarn size has been 10/2, starting with mercerized cotton. Below is a scarf that serves as a sampler for twills which also provides some texture.
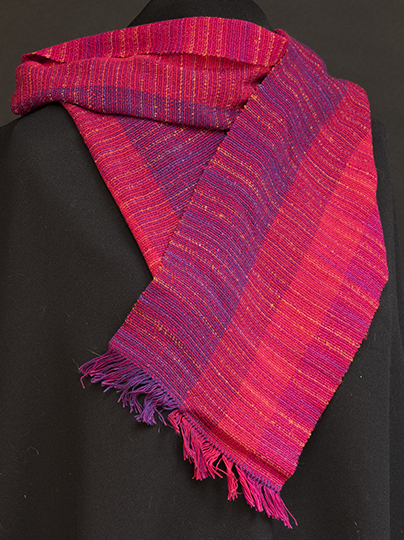
I could add more textures using a rayon loopy yarn as weft on a 10/2 mercerized cotton as I did in the scarf below.
Eventually Tencel™ became available to weavers. Sometimes it is confused with rayon which includes bamboo, but Tencel™ has its own trademark from a proprietary process which is reportedly more environmentally friendly that the rayon process.
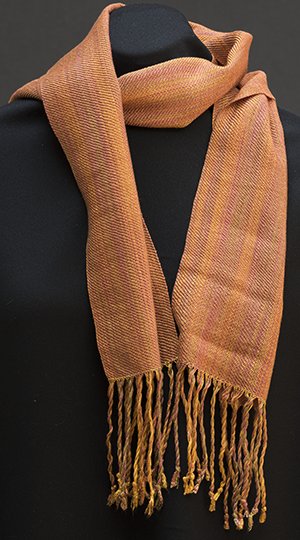
My favorite is 10/2 Tencel™, which sometimes it’s hard to find; 8/2 is more common The scarf below was woven with a 10/2 Tencel™ warp and weft from a Convergence® color scheme.
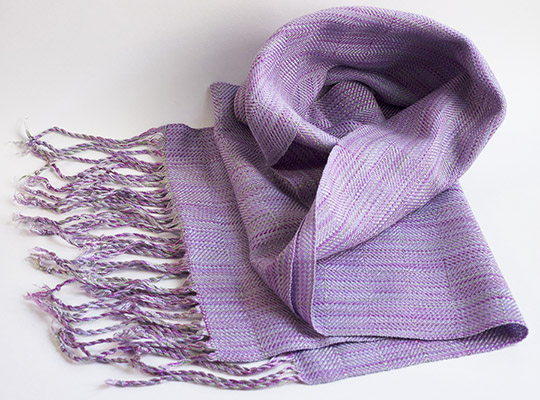
Tencel™ uses the same yarn system as cotton, 10/2 is the same size for both yarns, so they can be easily combined. Whichever yarn I use depends on what colors I have available. The flexibility is great. The scarf below uses 10/2 Tencel™ warp and 10/2 mercerized cotton weft.
Then one day I was working with 10/2 Tencel™ and looking for a specific color; I picked up a yarn I planned on using, only to realize that it felt a bit different than the others: sure enough, it was 20/2 silk, which is the other yarn I like to use. It turns out that 10/2 cotton and Tencel™ are very similar in size to 20/2 silk, so I had another option for mixing.
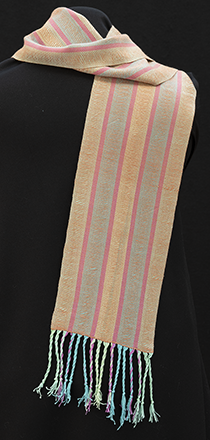
Below is a scarf that uses 20/2 silk for the warp, except for 10/2 rose Tencel™ stripes and then 10/2 Tencel™ for the weft.
Other size yarns can be mixed. Below is a scarf with a warp of 8/2 silk in rust, light brown and light green; I needed a gold, so I used 5/2 mercerized cotton. The warp was sett at 20 epi and the weft was light yellow 8/2 silk.
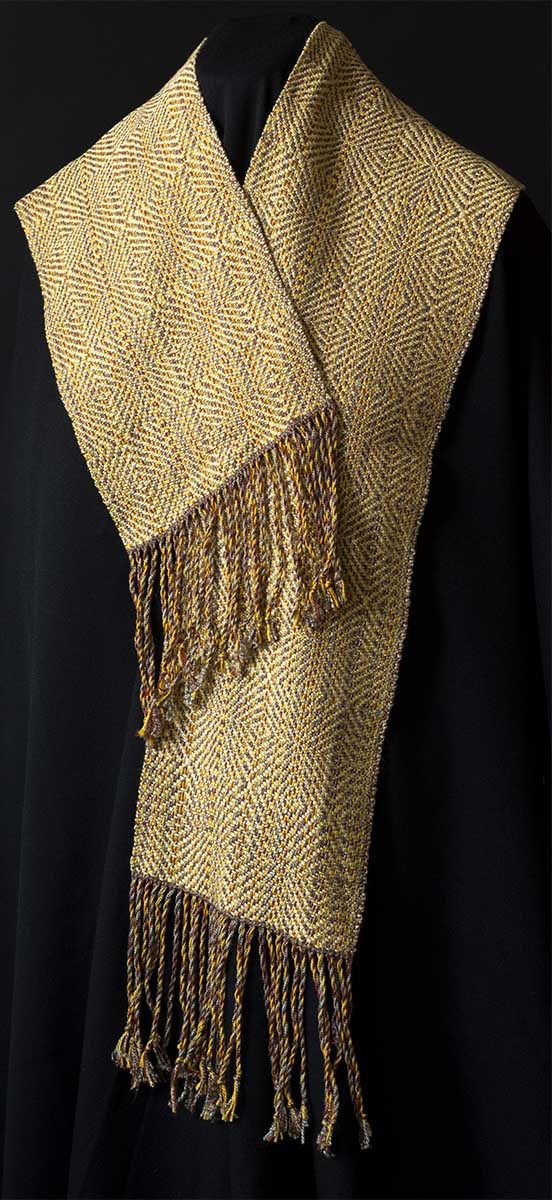
When warping with yarns that are very different in size, I use a reed in which the largest yarn fits easily. Then I double or triple the other yarns as appropriate. For some rigid heddle looms, reed pieces with different setts work well for this purpose.
When using this approach, it is good to remember that if warp ends are threaded on different shafts, but sleyed together, they will behave as the original size. If threaded together, then they become approximately the size of the combined yarn. For example, if I use two strands of a 10/2 yarn threaded on separate shafts, the yarn will behave as a 10/2. If I thread it together, it behaves close to 5/2. I have seen rigid heddle weavers not realize this difference and end up with a fabric that felt differently that they had anticipated.
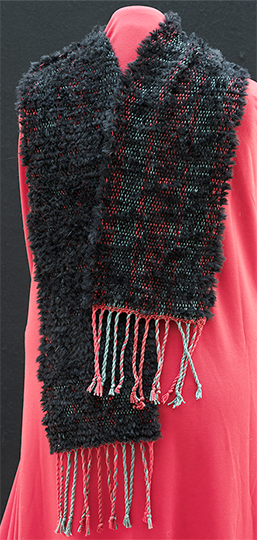
I combine synthetic yarns. Here is a scarf for the holidays: 5/2 silk in green and red and “Furreal by Knitting Fever”, a black faux fur. The sett was 10 epi, which brings me to my rule of thumb: if the weft is larger than the warp, open up the sett, as I did here. If the weft is smaller than the warp, sett the warp more closely.
When mixing animal and plant fibers, I am careful to wet finish for the more delicate fiber. Most wools full and shrink a great deal with warm water and agitation. That’s how we full wool on purpose, to make wadmal, for example. Yarns made from Down sheep are less likely to full. (I use the term full because “felt” is the result of fiber, not yarn, binding together).
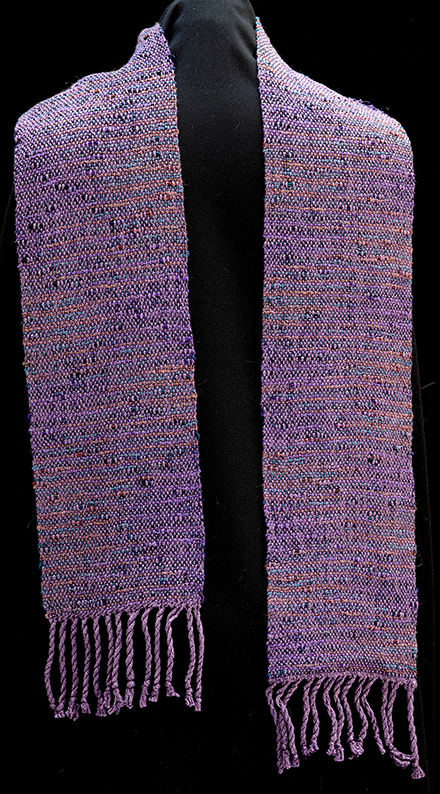
Below is a scarf with a wool and silk blend for warp and a slubby rayon for weft. Even with cold water weft finishing, there was quite a bit of shrinkage, 15% width-wise and 10% length-wise. In a scarf it doesn’t matter, but if planning a project where a specific amount of fabric is needed, for example for a garment, there is no substitute for sampling.
Next time you want to weave a project with different yarns, plan and finish carefully, it should work, but sample if unsure.
Happy exploring different yarns together!
Marcy
| Giving Weight to your Project |
Marcy Petrini
December, 2023
Throughout this month I have been working on organizing Roc Day, the celebration of spinners returning to our crafts. This year my guild, the Chimneyville Weavers and Spinners Guild, is hosting the event for the Gulf state guilds. Even though the traditional Roc Day is January 7th, the day after Epiphany, we always celebrate on the Saturday closest to Roc Day to allow people to travel if they have week-day responsibilities. This coming year it will be January 6, 2024.
The Craftsmen’s Guild of Mississippi is our co-sponsor, and the event will be held at the beautiful Bill Waller Craft Center in Ridgeland, MS with the help of the wonderful CGM staff.

We have goodie bags and every time that our guild hosts, I provide a small card with useful information – that’s the teacher in me. At least I hope it will be useful to others.
This year the information is for weavers. A lot of spinners weave on a variety of looms, so I want to offer a concept that many weavers – or spinners – don’t think about. There will be a card in the goodie bags with the information.
When I am planning a project with a new yarn, I like to think about how much the fabric is going to weigh – not how much yarn I need, that’s in the planning. I am considering the weight of the finished project to compare with other, similar projects.
Since most weavers are familiar with mercerized cotton, I decided to make the comparison using the most common of those cottons. Below is a scarf using 10/2. How does it compare with the other cottons?
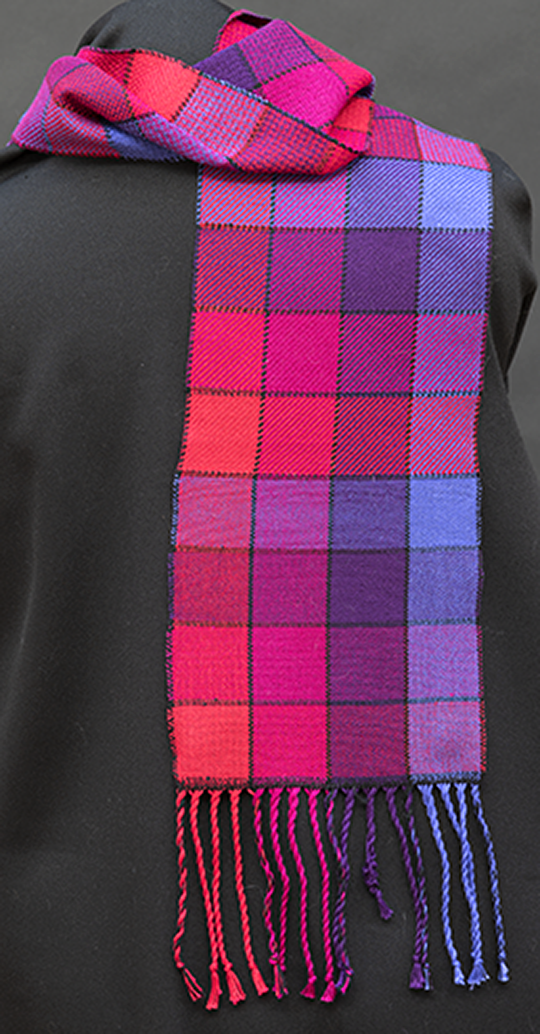
My usual scarf is 8” width on the loom, which becomes approximately 7.5” after wet finishing. Generally, the finished length is 60”.
For ease of calculations, I used 8” as the finished width, as it is easier to think in whole numbers.
To obtain the weight of the hypothetical scarves, these were my calculations: (“*” is the multiplication symbol I prefer to use):
8” * sett for twill *60” *2 / 36
The setts I used in the example are those I generally use for twills. The calculation assumes that the fabric is balanced, that is, the picks per inch is the same as the sett; thus, there will be the same amount of warp and weft in the finished fabric. Therefore, I multiplied the warp calculations by 2. Since yarns are listed as yards per oz., I divided by 36 to convert inches to yards.
Here are the results:
|
Yarn |
3/2 |
5/2 |
10/2 |
|
Sett epi |
12 |
18 |
24 |
|
Yards/Ounce |
75 |
130 |
260 |
|
Yarn in scarf |
320 |
480 |
640 |
|
Weight of scarf |
4.3 |
3.7 |
2.5 |
Clearly a scarf with 3/2 cotton is heavier than 10/2. How heavy we want to make a scarf is a matter of preference, but we need to remember that weight effects drape, the lighter the scarf, the more the drape, although fiber is an important component as well.
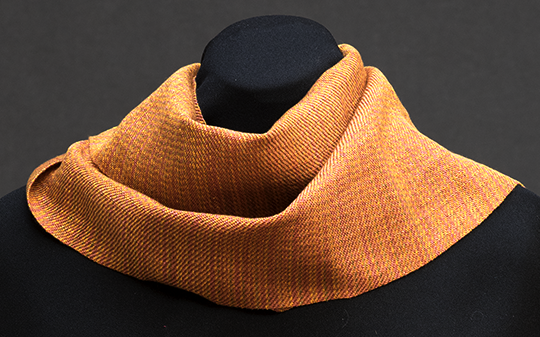
The other two yarns that I use a lot are 10/2 Tencel™ and 20/2 silk. Tencel™ uses the same yarn count as cotton, so the 10/2 column in the table above applies to Tencel™ as well. However, Tencel™ is slicker, I like its drape better for scarves. It also has more luminosity, reflecting the light well. Below is a scarf with Tencel™ for warp and weft.
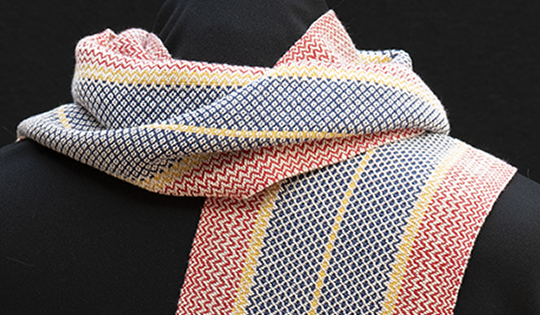
Silk has even more drape and luminosity than Tencel™. I like 20/2 silk, which is close in size to 10/2 cotton. I usually sett it at 24 epi for a twill, even though it has fewer yards per oz., 233 as opposed to the 260 in the table above. With the same sett and dimension the scarf in silk weights 2.7 oz, rather than the 2.5 for 10/2. The silk, however, drapes beautifully. Below is a silk scarf.
The weight calculation is approximate. Small differences can affect the results: slightly different dimensions, beat and sett not identical, and fringes from the warp. The comparison, however, is still useful.
In particular, however, it is important to remember that the yarn, not the heddle or reed determine the sett. I have a rigid heddle with 12 dent, I don’t sett every yarn at 12. If the sett is too open, the weft tends to pack in and results in a weft-dominant structure. The extra weft can increase the weight of the fabric by as much as 50% above that of a balanced cloth.
Once I am satisfied with my yarn choice, I proceed to the usual calculations to determine how much yarn I need for the project.
Next time you decide to use a new yarn, do a quick calculation, and check how the weight compares with other fabrics and whether that yarn is the best option for the project.
Happy Weaving and Happy Creative 2024!
Marcy
| My Inspirations |
Marcy Petrini
November, 2023
Were you inspired by my images?
The pictures I showed in my October blog were taken on a whim. Something caught my imagination. Later I see those images appear in my weaving. Sometimes it’s months later and sometimes the same picture will inspire more than one piece over the course of time.
Here are the pieces I wove inspired by those images, in no particular order.
This is our yard, my husband is the gardener in our family. There are steps that are barely visible in the back and there also steps to the side. I like to “step through the garden”, which is what I called the shawl. The light that filters through the trees appears as a lighter stripe in the shawl.

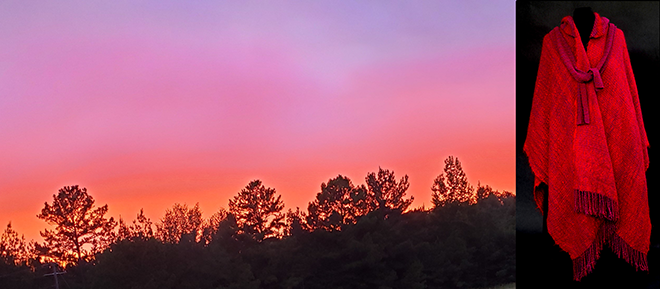
I love how the purple and red mingle in this sunset, taken just north of Jackson during a guild retreat. I tried to catch the luminosity of the sunset in this ruana that uses clasped wefts with a mohair and wool blend in red and red purple. We generally don’t think of mohair as having luster, but it does.
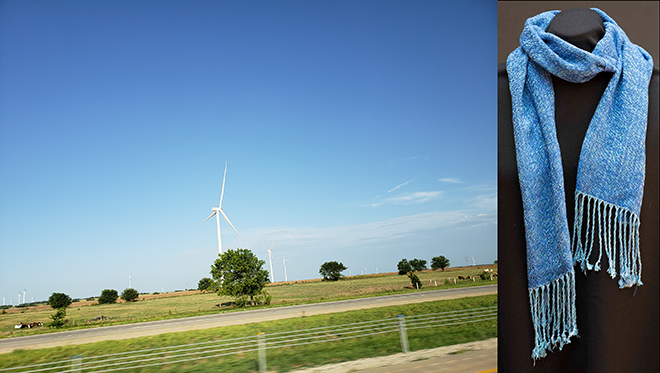
Many puffy clouds in this Western sky, photographed from the car on the way to Convergence® in Reno. I tried to capture the irregular clouds with the corkscrew twill in this scarf.
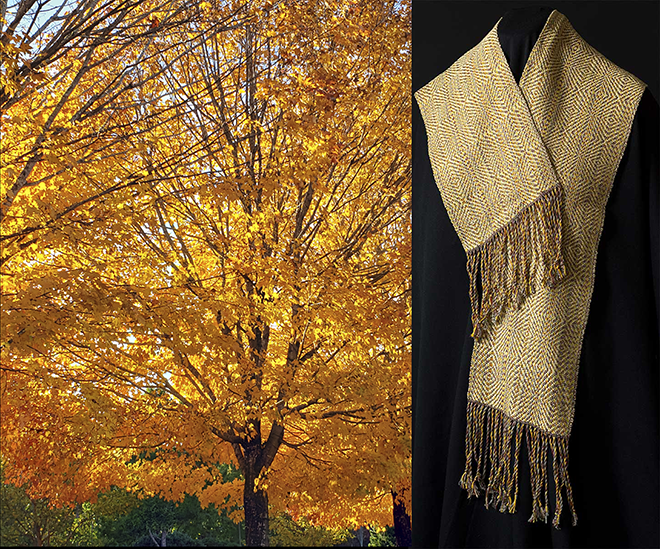
I love fall colors. They appear over and over in my weaving. The scarf captures the gold and brown from the tree, but also the intersections of the branches in the twill. The silk lights up the scarf just as light brightens the tree.
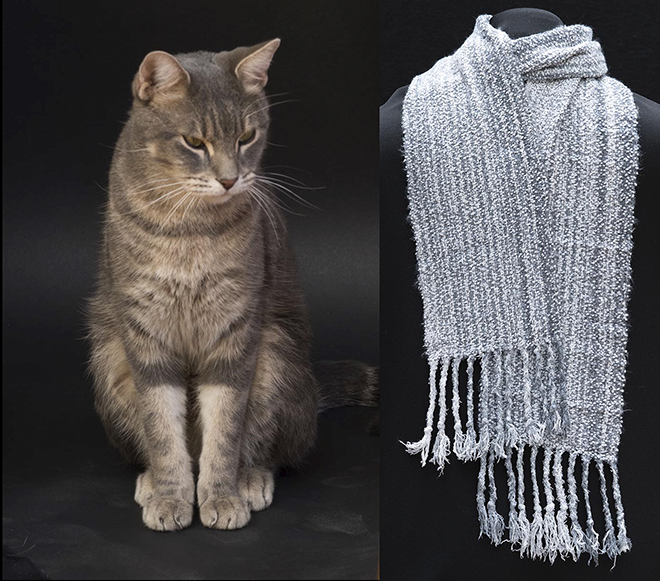
Not all inspirations are joyful. Our little RT was killed by a reckless driver. He was affectionate but also adventuresome. Everyone in the family received a fuzzy and soft RT scarf in white, grey and black to remember him.
How do your inspirations compare with mine?
Join me at Convergence® as we explore our inspirations!
Happy Weaving and Happy Thanksgiving!
Marcy
Marcy
